


In the prior post, we demonstrated basic timers, events, button inputs and oled output.
Getting Started with ESP32 part 2 : Basic Demo Enhanced
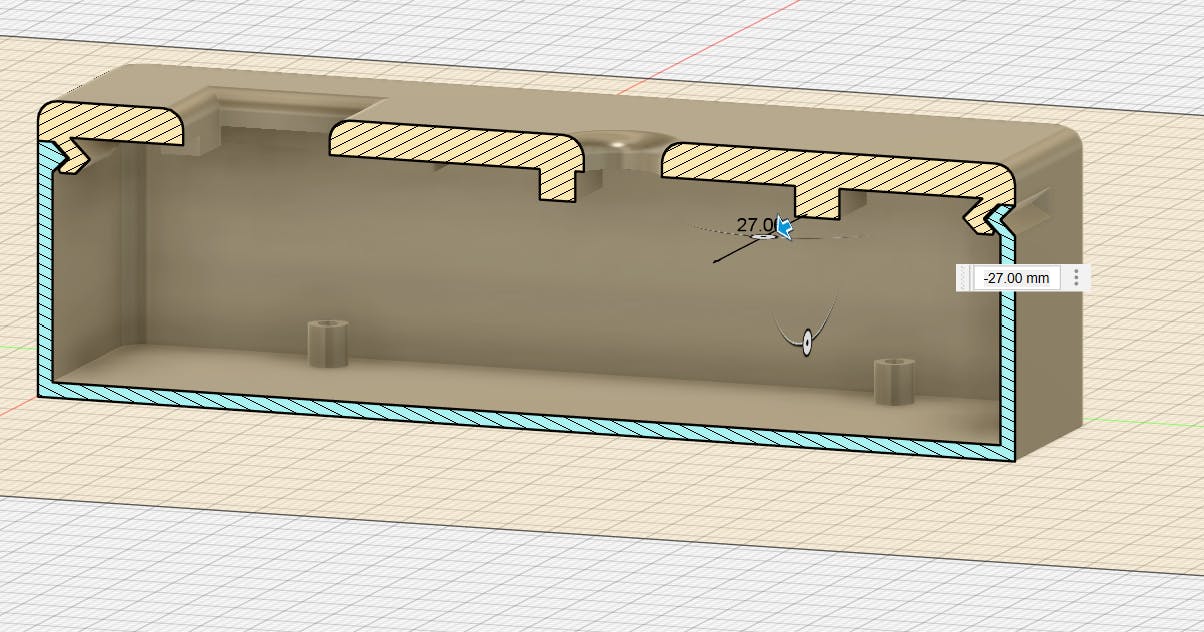
Enclosure Design
I watched a few YouTubes on designing snap-fit cases, so with Fusion 360 and my Artillery X2 3D printer, I prototyped a small case for a hand-held digital walkie-talkie and/or text messages.
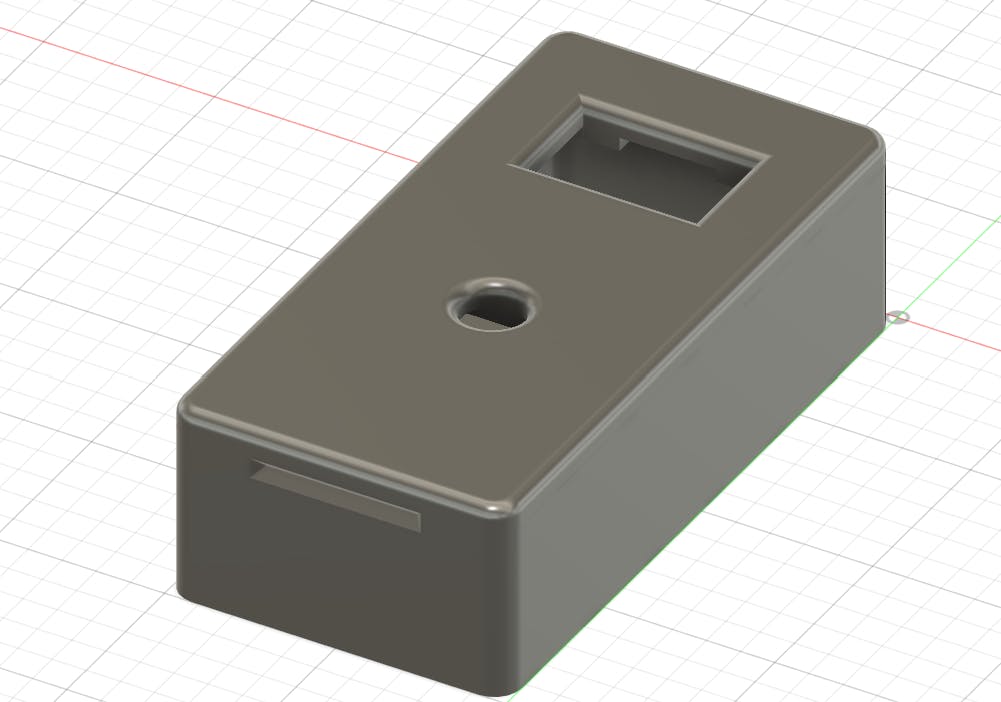
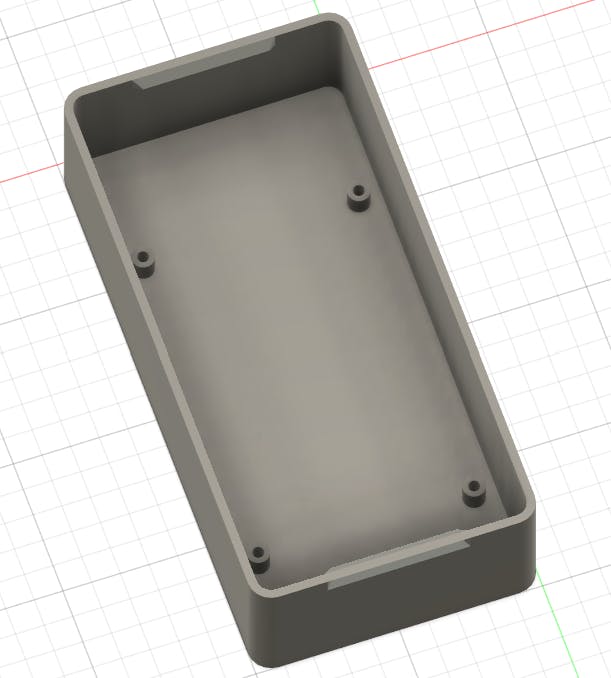
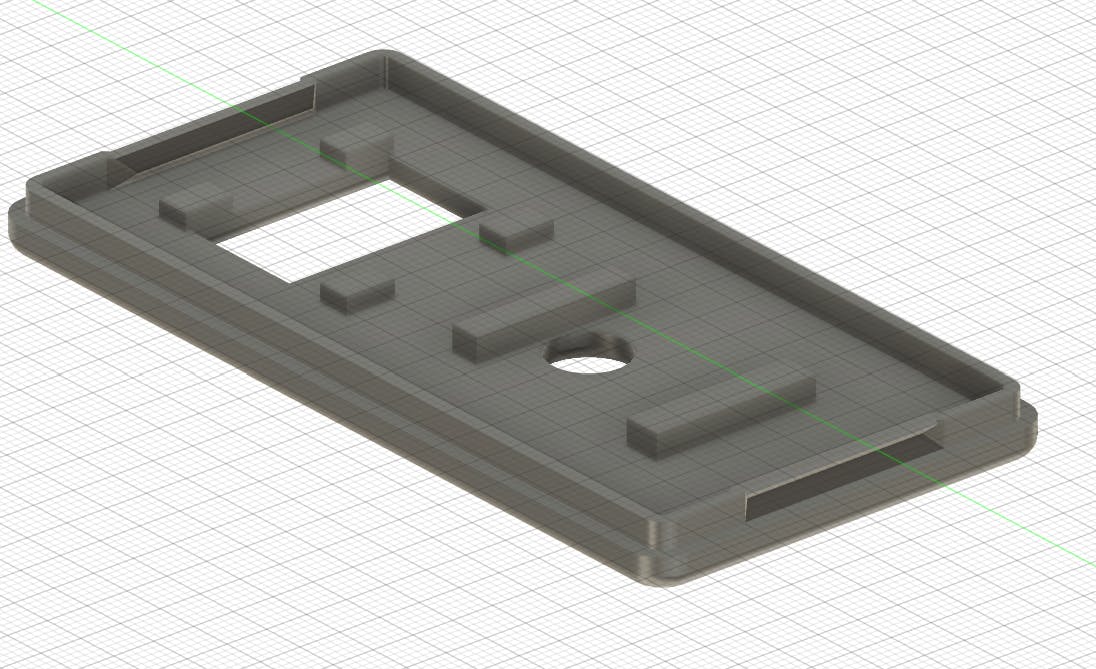
I learned about the Fusion 360 feature for looking at the cross section among some other.
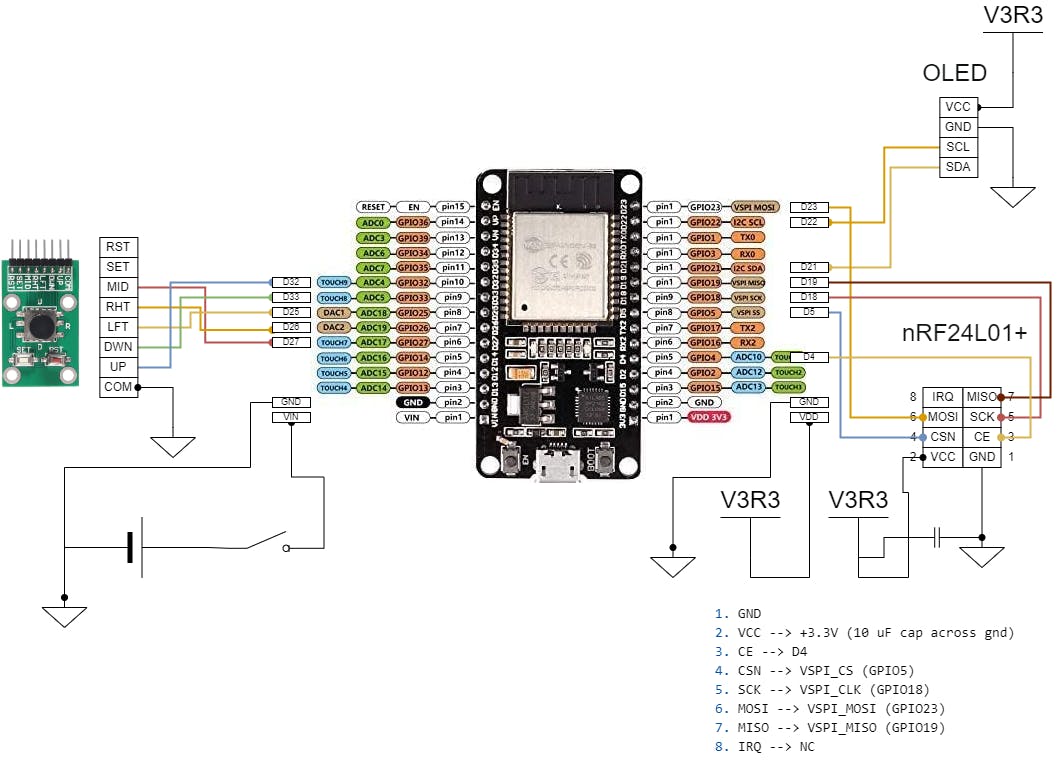
Hardware Design
I ordered some small prototyping boards, so soldered down components per the following schematics to hook up the transceiver. I looked into different battery options, but planning to just use a 9V battery for this first version.
Transceiver Testing
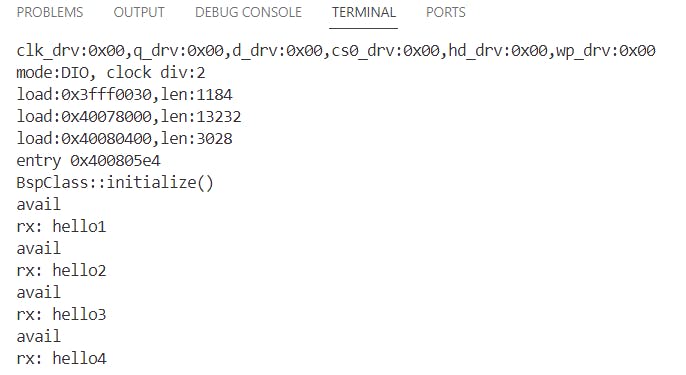
I needed to build two of these to test properly, but to start out, I'm hooking the center button to a test transmission. Upon receive, it prints the received text to serial. It also increments a counter.
I built one on a perf board with a 9V battery, and the other I temporarily wired together on a breadboard and powered via usb.

Next Steps
I've got some connectors coming in, so deferring building the second one until then.
The enclosure was also a little small, so I have some revision to make there also.
I bought a buzzer too that I haven't hooked up yet
I need to look into the ultra low power modes, initialization and wake-up.
I'll put together a menu system next to enable some additional usability.
Reference
Source
https://github.com/ericjameszimmerman/esp32-demo/releases/tag/0.3.0
Recommended YouTube
https://youtu.be/YCUkFGI3RZI?si=h1-9mUtI_6VlIE-b